Adding full page photos to your blog book
Make your most special photos stand out
Printing your blog as a book on itself is already a very special project. And our blog book editor makes this a very easy process. There are many customization features that you can use to make your book a permanent keepsake that is absolutely wonderful.
In this article, we will show you how to use one of these features: adding full page photos to your blog book. Here is what we are talking about:
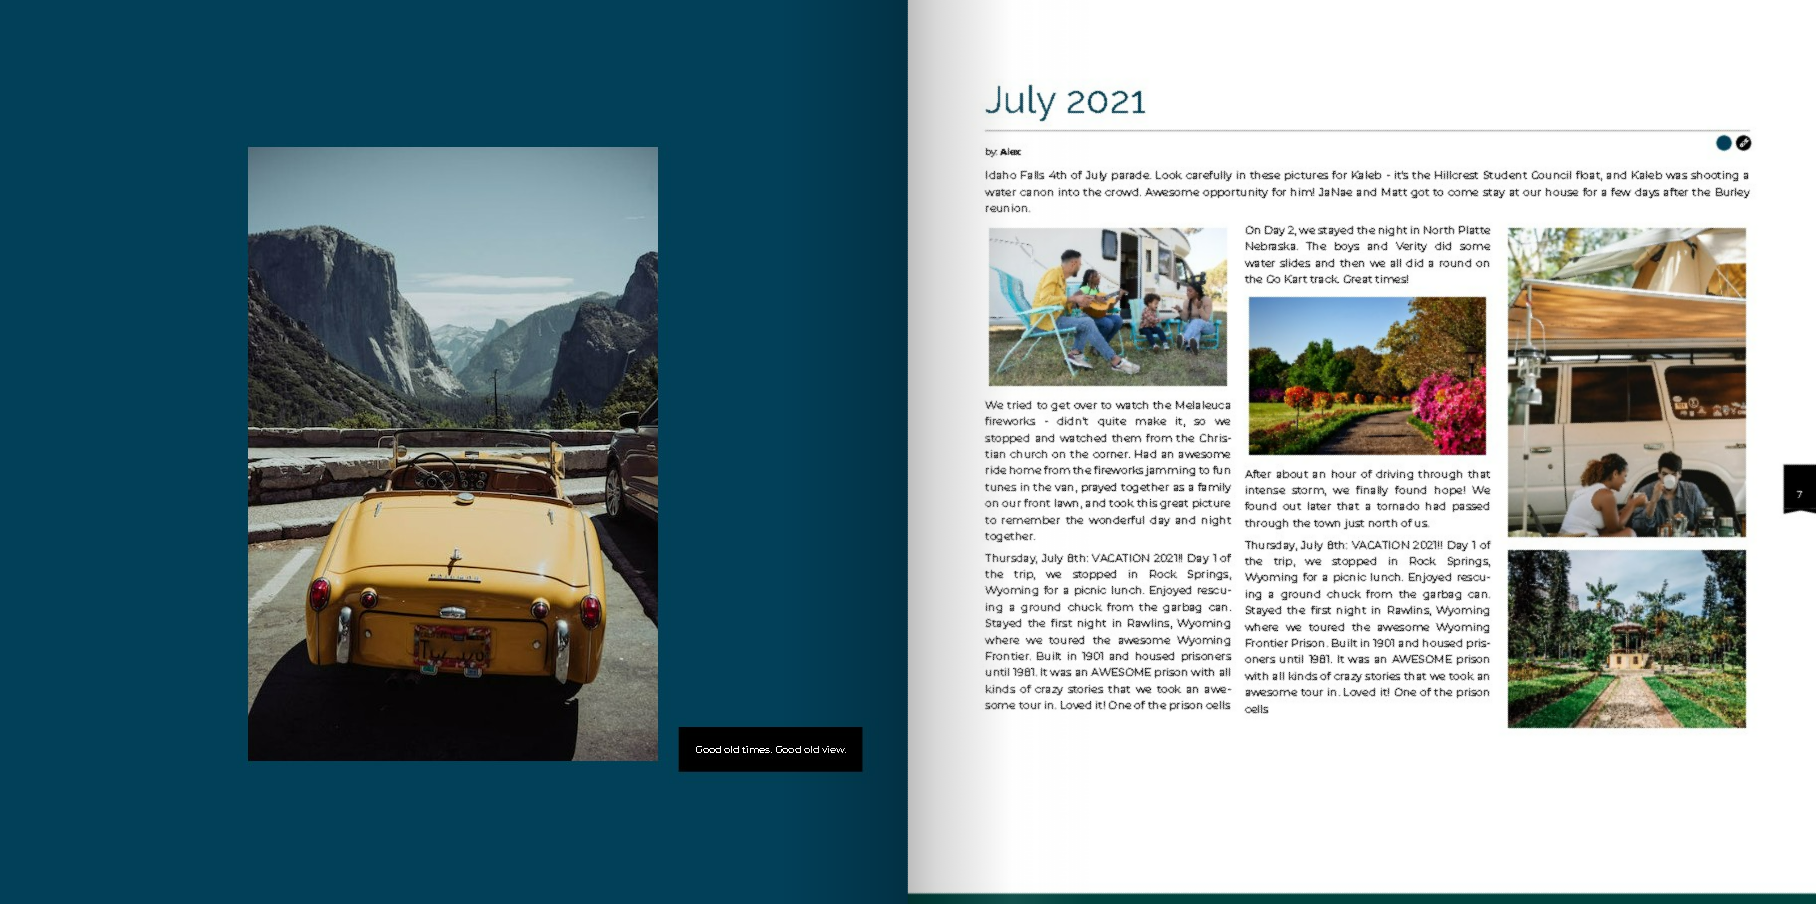
Looks great, huh?
Easy step by step instruction
Adding beautiful pages like this to your blog book is super easy. Here is how you do it.
- First, open your book project and when in the book editor, go to step 5 (Bookitem editor).
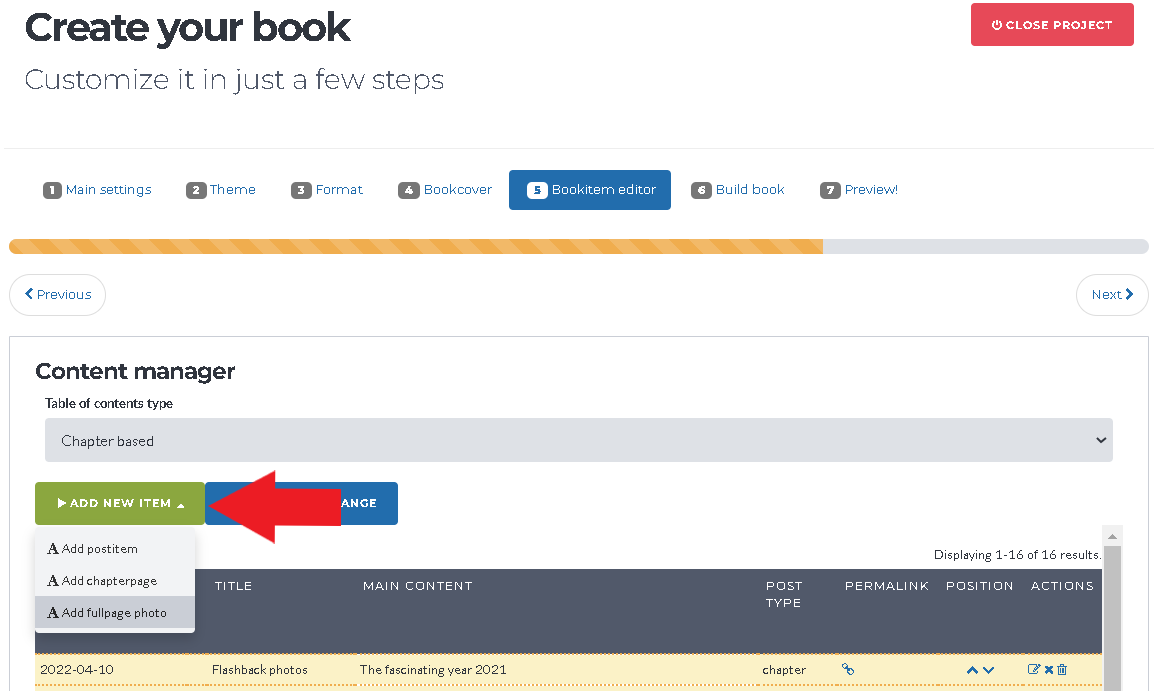
- Now, click on the green ‘add new item’ button
- A dropdown menu appears. Choose ‘add fullpage photo’

- Now a popup will appear that allows you to upload a photo from your local device. You can also add a photo caption if you want.
- Save the item
- Your postitem list will now refresh. When done, the new fullpage item will appear at the top of your postitem list.
- Drag & drop the fullpage item in the postitem list to the position that you want it to appear in the book.
And you are done!
In case you have read this article and still have questions, let us know by email and our support service will gladly help you!